A Small Still Life for a Study of Texture
A small still life study of texture helps you see how light and spacing change familiar surfaces, using a few household objects and a simple arrangement.
The most common mistake in a small still life study of texture is choosing objects that all look smooth from across the room. The arrangement may seem tidy, but it gives your eye little to compare; a rough edge, soft fold, or glossy reflection can disappear before you have a chance to notice it. A few familiar things with contrasting surfaces make a more revealing subject.
This is a looking exercise, not a test of drawing skill. You can work with a phone camera, a notebook, or simply your attention. The aim is to notice how a surface changes as you alter the light, the angle, and the gaps between objects.
Choose objects that invite comparison
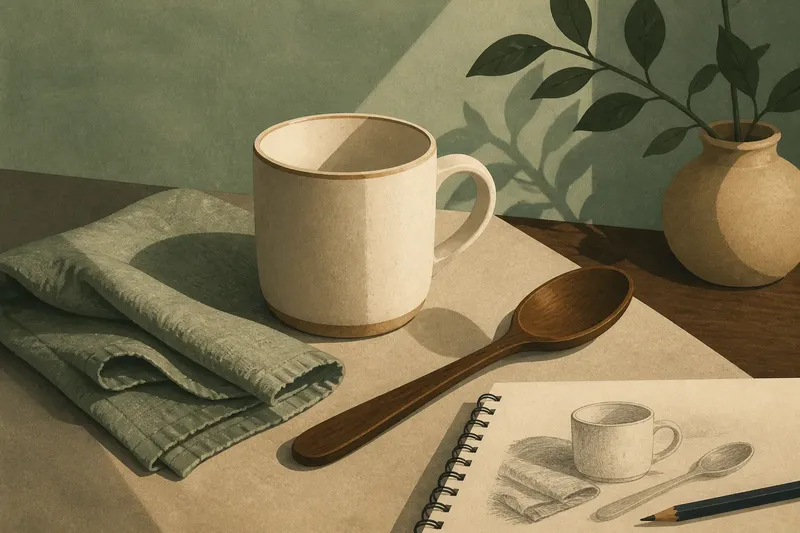
Start with three objects that differ in surface and shape. A ceramic mug, a folded cotton napkin, and a wooden spoon offer useful contrasts: hard and soft, matte and slightly reflective, curved and elongated. You might instead choose a glass jar, a citrus fruit, and a piece of corrugated cardboard.
Pick objects that are easy to handle and do not need elaborate preparation. Look for visible details such as a chipped glaze, a woven edge, a brushed finish, or a dull patch on polished metal. These are not flaws to hide. They give your eye landmarks as the light shifts.
For a first arrangement, avoid objects with busy labels or large printed patterns. Their graphic marks can pull your attention away from the way the material itself catches or absorbs light. You do not need objects that look expensive or especially beautiful; ordinary household things are often easier to inspect closely.
Set up a quiet viewing place
Choose a table or desk where you can sit comfortably and see the objects from one steady position. A plain sheet of paper, a neutral placemat, or an uncluttered tabletop can keep the background from competing with the surfaces. Leave enough room to move one object without knocking the others aside.
Daylight from a nearby window is a useful starting point because it shows gentle changes across a surface. If daylight is unavailable, use a desk lamp and keep it in one place while you look. A single light source makes it easier to tell which changes come from the objects and which come from your own shifting viewpoint.
Turn off or move extra lamps if they create several competing highlights. It is not worth rearranging an entire room, buying a special light, or polishing every object until it gleams. The point is to observe familiar materials as they are, not to stage a flawless display.
Arrange the still life in a simple order
Place the largest object first, a little to one side of the center. Add the other objects nearby, leaving small areas of visible background between them. The gaps matter: when edges touch, it can be harder to tell where one form ends and another begins.
Set the objects at different depths rather than lining them up like items on a shelf. A spoon can angle toward the mug; a folded napkin can sit slightly behind both. Keep each object stable, and make sure the arrangement still reads clearly from where you plan to sit.
Say you place a pale ceramic mug beside a dark wooden spoon and a loosely folded napkin. The spoon’s narrow silhouette may stand out against the cloth, while the mug’s rim can be easier to see against the darker wood; a small sideways adjustment should make one of those boundaries more distinct from your seat.
Once the arrangement feels legible, pause before adding anything else. A fourth object is useful only if it introduces a surface or shape you cannot already observe. More objects can crowd the gaps and make it harder to study how each material behaves.
Look at the surfaces before changing the light
Keep your position steady and give each object a quiet look. Notice where its surface appears lighter or darker, whether an edge looks crisp or soft, and whether any reflection has a clear shape. You are not trying to name every detail; you are building a small set of observations to compare later.
Try following the outline of one object with your eyes. A folded napkin may have a firm crease along one edge and a softer, less definite contour on another. The mug may show a bright rim while its body remains comparatively even. The spoon may carry a narrow highlight that changes along its curve.
Now look at the places where two objects nearly meet. A thin strip of background can separate their contours, while a direct overlap can make one object seem to continue into the next. Notice whether the gap feels open, pinched, or balanced; those impressions describe the composition as much as the objects themselves.
Change one light or spacing choice at a time
Begin with a spacing change. Move just one object a little closer to another, then look again from the same seat. Do their outlines become easier to distinguish, or does the tighter gap make them feel joined? Restore the earlier arrangement before trying a different adjustment if you want a clear comparison.
Next, change the direction of the light while leaving the objects in place. If you are using daylight, gently turn the arrangement or move it to another side of the table; if you are using a lamp, shift the lamp position rather than moving several objects at once. Avoid looking directly into a bright bulb. Watch how a shadow edge, highlight, or patch of reflected light changes.
Finally, alter your viewing angle by sitting slightly to one side or standing briefly. The change may reveal a texture hidden from your first position: the top of the folded cloth, the inside of the mug, or a subtle grain in the wood. Return to your original seat before deciding which arrangement makes the surface relationships easiest to see.
Record what changed without overworking it
If you want a record, make a quick thumbnail sketch or take a photograph from your seated position. Add a few words beside it, such as “soft shadow on cloth” or “bright line on rim.” A note tied to a visible detail is more useful than a general judgment that the arrangement looks good.
You can also make two small sketches showing a different spacing choice. Keep the forms simple and mark only the edges, shadows, and highlights that help you remember what changed. A phone image can preserve the broad arrangement, but a brief written note can capture a surface quality that a camera does not make obvious.
Do not keep adjusting the scene in search of one perfect version. Once you can describe a visible difference between two arrangements, the exercise has done its work. The materials do not need to look polished, and your drawing does not need to resemble a finished artwork.
What should you look for as the arrangement changes?
How can I make texture easier to see?
Use objects with visibly different surfaces and let light cross them from one direction. A shallow angle of light can make folds, grain, or ridges easier to notice, while even light may soften those details.
Should the objects touch?
They can, but leave some edges separate so each form remains readable. If two objects merge visually, shift one enough to open a small strip of background between them.
What background works best?
A plain surface in a tone that differs from at least some of the objects is a helpful start. A sheet of paper or an unpatterned placemat can reduce visual clutter without needing a special backdrop.
Can I do this without drawing?
Yes. Sit in one place and describe what changes when you move an object or alter the light. A few written observations or a sequence of phone images can preserve the comparisons just as well for this exercise.
Let the final arrangement stay ordinary
When you finish, put the objects back where they belong and keep any sketch or note that helps you remember what you noticed. The useful result is not a display to imitate but a sharper way of seeing: a mug’s rim can look more pronounced, a cloth edge less certain, and a wooden surface richer or quieter as the light and spacing shift.
A small still life study of texture can fit into an ordinary pause at a kitchen table or desk. Next time you handle those same objects, notice which surface catches your eye first and whether the surrounding space makes it stand apart. That brief comparison is enough to carry the exercise into daily looking.